Email marketing is something which bloggers can not neglect now a days. If you are not doing the right email marketing, then your future can be at stake someday. Email marketing includes adding an email subscription service to your blog so that those who really want to receive your posts may subscribe to your blog through the email. In this way, people start to subscribe to your blog through email and with every day your chances to get traffic, once a new post gets published, are increased. Thus, technically email marketing helps you to increase your email list count of your blog which can be used to drive traffic as well as to promote affiliate products.
MailChimp – A free email marketing tool:
Last time I posted a tutorial on how to use Feedburner as the email subscription service, but this time I am going to help you setup a mailchimp email subscription tool account, which is more advanced and more customizable than the feedburner. Mail chimp has the following benefits:
- Customizable Email templates for sending the blog posts to the subscribers in a classic manner.
- Distributing the subscribers in different groups, i-e letting subscribers choose what they want to receive from your blog’s feed.
- Creating as many lists as one may want under one account for different sites.
- Creating many campaigns for different lists for different kinds of automated emails.
- Addition of fields to the email subscription form.
- Personal Email subscription page with customizable interface.
- Other common facilities which every email marketing service has!
Using MailChimp to let your blog visitors subscribe with email:
Below is the step by step guide to start using mailchimp as the ultimate email marketing software.
- Create an account over the mailchimp to start using their services.
- Go to the dashboard and there you will see menus like lists, campaigns and reports etc.
1- Create a subscribers List First in Mailchimp:
You need to create a email subscribers list first in the mail chimp, for that just go to the lists. Its actually the list which is going to hold your subscribers information. So that later you can add the list to a campaign.
1- At the top right corner of the screen click on “Create List“.
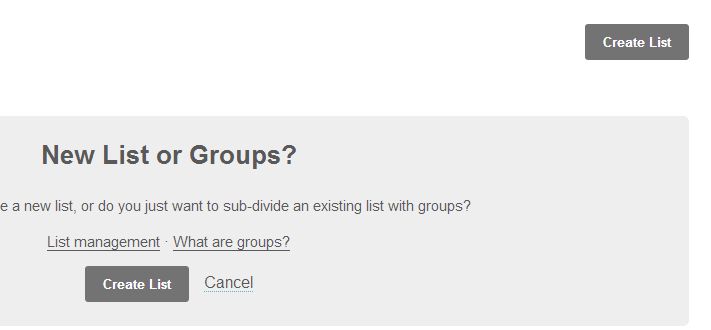
2- At the next screen just fill out the fields with the necessary information. Like the name of the list (Name it something which you may remember), the from name in the email (the name which will be used while sending your blog posts to the email list subscribers) and in the bottom do tick the reports options, like receiving the notification for every new subscription and unsubscription. After filling out everything, just click on the “Save” button. You list has been created.
2- Adding campaign to the List of Subscribers:
1- Now you need to setup an RSS feed campaign for the list you have just created in the mailchimp. This rss campaign will fetch the latest posts from your blog automatically to send it to the subscribers of the list, so that your blog readers may enjoy your posts directly in their inbox. Let’s setup a campaign:
2- Go to the campaigns in the mailchimp dashboard. There create campaign through the button at top right corner, same as you created the subscribers list.
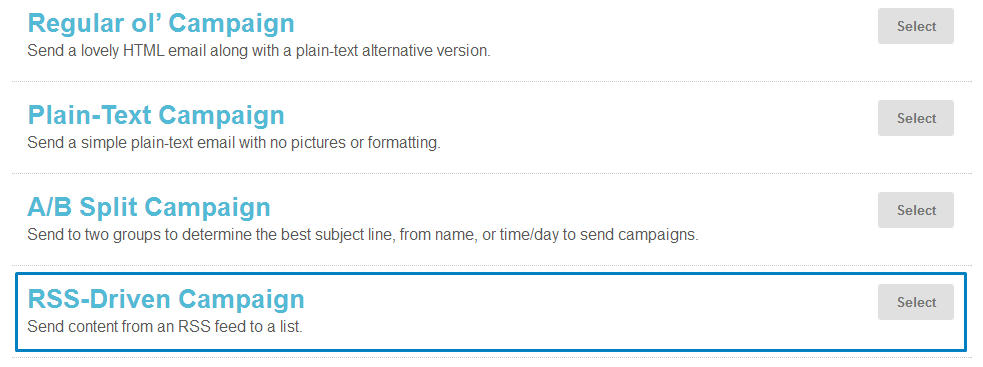
3- In the create campaign list select the RSS Driven campaign. Because you want that your subscribers of the list may get the newly published posts fetched through the RSS feed of your blog. If you don’t know about the RSS feed then it is fine, just keep on following the tutorial.
4- In the next step you need to give the RSS feed url of your blog. If you are at blogger than this is going to be something like:
http://blogname.blogspot.com/feeds/posts/default?alt=rss
and Incase you are using self hosted wordpress blog than your feed url is going to be like:
http://example.com/feed/rss/
That is it, just replace your domain names accordingly. Put, in the right url in the field and press Next after selecting a suitable time for the email to be sent to the subscribers. If you want that your new post may be sent at the same day then select every day of the week.
5- In the next step you will need to select the list of subscribers whom you want to send the latest posts emails of your blog driven through the RSS. You will see the list you recently created to be there. Just select the list. (Here! you will see that there are currently no subscribers in the list, you must have at least one subscriber to the list to save this campaign. For this reason, subscriber yourself to the list and then create the campaign) After selecting the list press next.

6- In the next step you will need to name your campaign. Do it accordingly:
- Name your Campaign: Suppose your blog is of tutorials, so name it as Tutorials.
- Posts From: You can name it anything, like your blog name, or even variables like “*|RSSFEED:TITLE|*” will render the title of your RSS feed and like “*|FEEDITEM:TITLE|*” is going to pull the title of the post which will be emailed to subscribers. So, be creative and use the most good thing you can think. (For Complete Lists of Tags open : Merge Tags of MailChimp)
- From Email Address: You can use the same email address which you used while creating the list. Or you can also use a domain specific email address to make it more special.
- Click on Tracking and Social to set options as per your own needs.
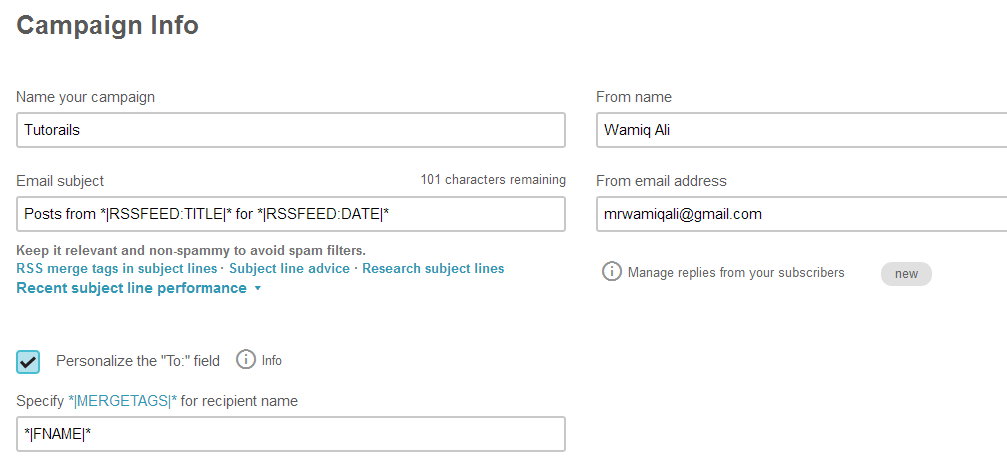
7- In the next step you can design your own email template, can select premade email templates from the mailchimp and can even use a previously made email template for any other campaign. This is a plus point, if you want to make your own email template than things are easy here, its just a drag and drop job. So just click on “Start Designing”
8- In this screen you will see “Basic template” click on that and select on suitable layout for your blog post email.
9- At the next screen you will have a lot of customization options, like adding image to the email template and editing the surplus text of the email body. Just hover over anything and there you will see a small pencil for editing that section. First you must edit the mail body section where user is going to read your email.
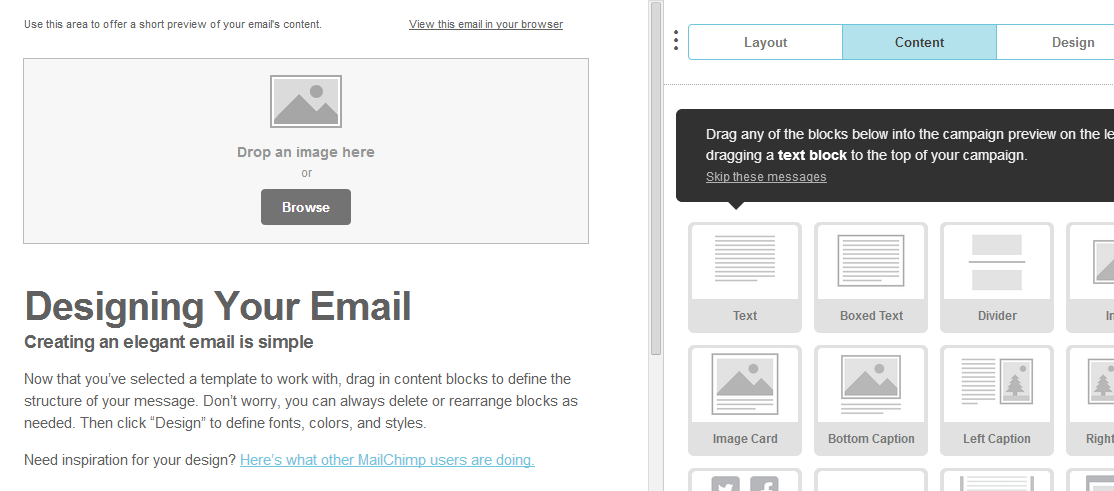
10- Make it something like this, these variable with the percentage are the dynamic ones which will fetch specific information from any post fetched from the RSS.
<h1>Newsletter For Lifestyle</h1>

<p>*|RSSFEED:DESCRIPTION|*</p>
Following are the new thoughts on lifestyle which are worth reading!

<h1 class="null"><a href="*|RSSITEM:URL|*" title="Read *|RSSITEM:TITLE|*">*|RSSITEM:TITLE|*</a></h1>

<p>Dated On: *|RSSITEM:DATE|* | Summary: *|RSSITEM:CONTENT|*</p>
*|RSSITEM:LIKE|* | *|RSSITEM:TWITTER|* | *|RSSITEM:PLUSONE|*
This is the template of your email, which you can modify accordingly. Don’t forget to use the above code in the code section of the body editor. You can toggle the code view with this button:

11- So, the RSSITEM:TITLE is going to fetch the title of the post and will send subscriber the same title of the post which you have recently published, the same is the use of other variables. In the end I have placed the social buttons, so that one may be able to share the post withing the email.
12- After you have designed the email template accordingly then press next to proceed further. At the next stage click on “Copy text from HTML Email” this will copy the same previously created email template to the html format. This html email format is for those old devices and browsers which actually don’t support rich media in new emails. Then press next.
13- At this last step, you must have everything ticked, if you don’t have any subscriber in your selected list for the campaign then you may need to add one users to the list and this is going to be you initially as I told you earlier. Mailchimp never lets you create a campaign if your list doesn’t have any subscriber. You will get error like this:

14- To resolve this issue just be a subscriber yourself (As I told you, the list can’t have a campaign with zero subscribers) and press Save and Exit at the top right corner of the screen in campaigns last step.
3- Promoting your email subscription list on your blog through email subscription form to gain email subscribers:
You have successfully added the RSS driven campaign and also the email subscribers list to the mailchimp. The next step and the last one is to promote your subscription form so that any user may be able to subscribe to your’s blog newsletter. This is really simple as mailchimp has some really pretty email subscription html embed forms. To add an email susbcription form at the sidebar of your blog just do the following steps:
1- In the mailchimp dashboard go to the Lists and there click on the list which you have just created. You will be taken tot he settings and main menu of that list.
2- Open “Signup Forms” and from this menu select “Embedded Forms“.
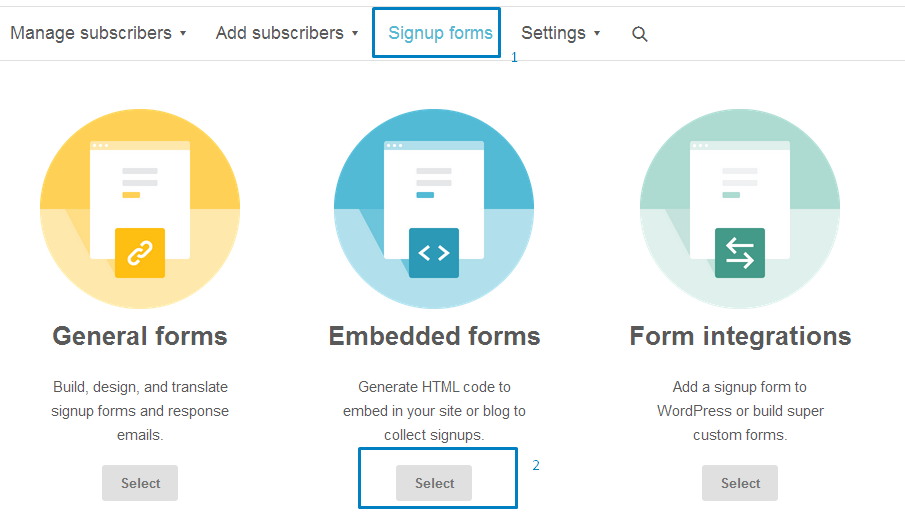
3- Here, its up to you that which form embed code you want to select. If you know CSS and can style the form yourself then go for the naked form version. In the other case select “Classic Form” layout. Copy all the code given below in the text area as shown in the below screenshot.

Adding Email Subscription form to WordPress/Blogger:
Till now you have copied the code and now you can add this form anywhere, whether that is a html site, wordpress site or else a blogger one.
- In case you have a wordpress site, just go to the dashboard of your wordpress blog. Go to Appearance>>Widgets, and there add a new Text widget in the sidebar. Give title like “Subscriber to Receive our posts in Inbox” and then in the text widget paste the whole copied code. This will enable you to place email subscription form there in the sidebar of your wordpress blog.
- If you have a blogger site, then there is no problem at all. You must login to your blogger account and open that blog of which you just added a RSS driven campaign. Go to the layout section from the side menu. Add a new gadget in the sidebar gadgets area and just paste the code which you had copied before. That is it, you are done.
You will notice a cool subscription form has been added to the sidebar of your blog.


hey Boy! you covered mail chimp very well… btw 3-4 months back I tried to make successful campaign with mc but unfortunately, very on the first day of signup my account got suspend as i try to upload my email list… 😛 after that I never try them again anymore. But it seems its worth to test my luck once again… 😀
You must have done something wrong, I am using mailchimp over talkofweb and I never faced such a problem. And thankyou for the kind comments!
[…] Another Ultimate MailChimp Setup Guide […]