You don’t always need a data cable to sync your iPhone with PC. This guide explains how to use WiFi in order to sync your iPhone. We’ll also explore a few third-party applications which offer a similar solution. However, the iTunes application is the best one because Apple has provided it for the said purpose.
iTunes WiFi Sync: Backup iPhone data on PC without a USB Cable
If you are using a MacBook then you can find these settings inside Finder. Let’s learn how to do it on macOS:
How to sync iPhone over WiFi using Finder on macOS:
- Connect your iPhone with USB Cable on your MAC. If it asks whether you trust the connected device or not, then confirm that you trust it.
- Open Finder and there you’ll see your iPhone mounted in the left sidebar. Click on the mounted iPhone.
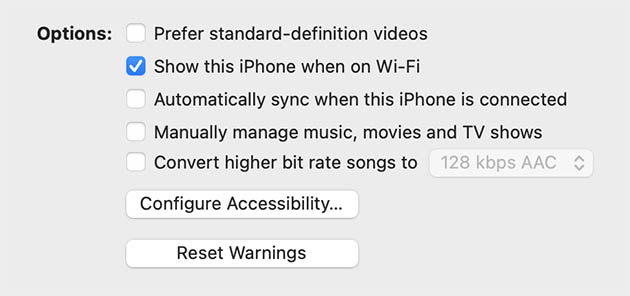
- Scroll down, under Options tick Show this iPhone When on Wi-Fi.
- Remove the USB cable and connect your iPhone to the same router with which your PC is connected.

Make sure that your device is unlocked so that iPhone Wifi sync works. A locked device is often not recognisable on the WiFi router. You’ll notice that after enabling that particular option, you’ll view the device in similar manner inside Finder, as connected to a USB cable.
How to sync iPhone over WiFi in Windows 10:
Finder on macOS makes it easier to sync iPhone on WiFi. Let’s learn how to backup your iPhone on Windows 10:
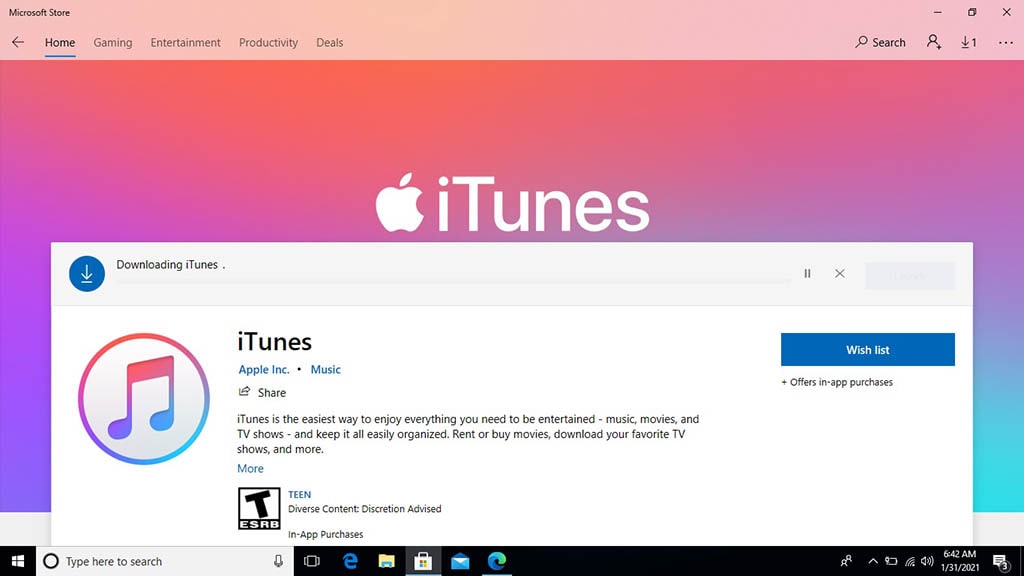
- You need to install iTunes for Windows 10. It’ll take you to the Microsoft Store. In case it gives you an error and doesn’t allow you to download iTunes, maximize your Microsoft Store Window. Reload it and search for iTunes.

2. Launch iTunes from the Start Menu of Windows 10. Connect your PC and iPhone through USB Cable. Your iPhone will ask if you trust this computer or not, simply tap Allow. It’ll take a few minutes before Windows 10 finishes installing iPhone drivers.
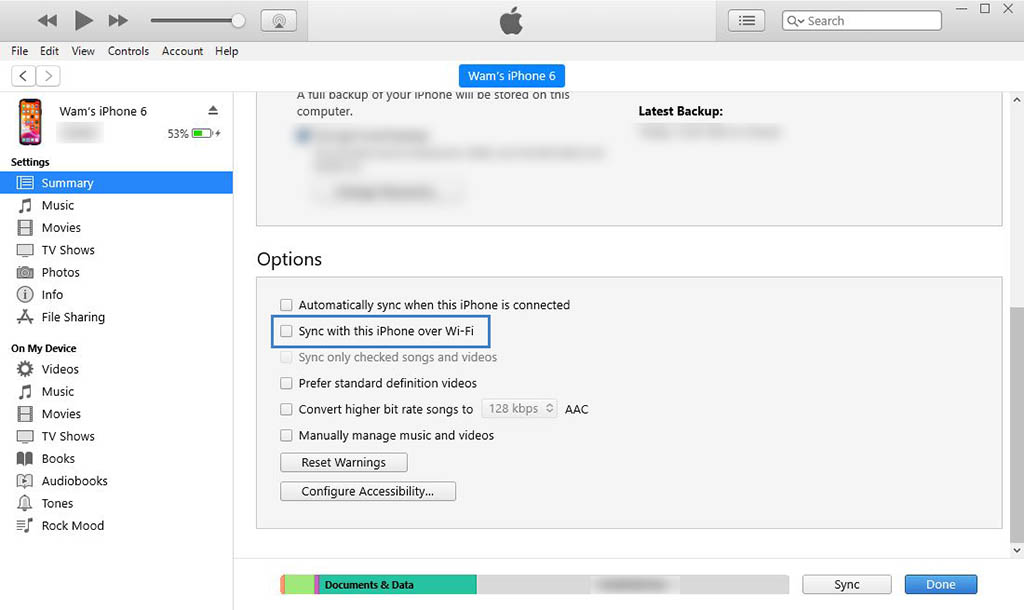
3. Once iTunes recognises your iPhone. Click on the Mobile icon shown below the Menu Bar. Click Summary from the left sidebar. Under Options tick Sync with this iPhone over Wifi.

4. Remove your iPhone’s USB cable. Make sure you connect your computer and iPhone to the same network router. This time your iPhone will be connected to iTunes without any USB Cable.
Transfer Files between iPhone and Computer using WiFi without iTunes:
If you have configured iTunes the way mentioned before, then you can easily transfer files, sync, backup and share music between your computer and iPhone. However, in case you don’t want to use iTunes then you need to play around with third-party apps. However, there is a serious limitation faced in those third party apps. They sometimes don’t allow complete access to the local storage of your iPhone.
Third-party app for sharing iPhone files with Computer:
There are two notable applications which promise such a functionality. One is Zapya while the other one is SHAREit. We’ll review SHAREit as both apps work in a similar manner. Let’s learn how to share files between iPhone and any other platform using SHAREit.
- Install SHAREit on your iPhone through Appstore.
- Connect your iPhone to WiFi. Make sure your computer is also connected to the same network.
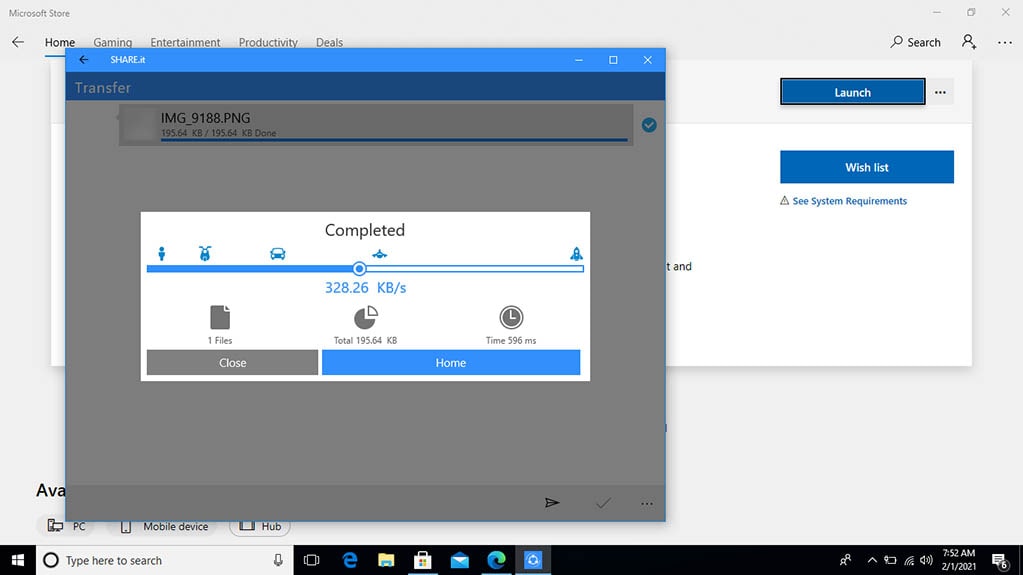
- On your computer, download and install SHAREit desktop through Microsoft Appstore. After installation click Launch. You might need to accept the agreement on the first run.
- If you want to receive any file press Receive. On the iPhone send some file. Soon you’ll see your computer in the scan list, tap it.
- After a successful transfer, you’ll see that file inside your computer in SHAREit. Right-click and open inside folder.

Similarly, you can send videos and other media files from your iPhone to Windows 10 PC. In a similar fashion if you are using Mac. Launch App Store and search for SHAREit. You’ll find a mac version.
Conclusion:
iTunes offer a built-in Apple-provided system to Backup and restore the iPhone using WiFi. On the contrary, third-party apps are fast but they offer limited features. Using iTunes you can also access apps storage, however, similar functionality isn’t present in SHAREit. Although on SHAREit you can access the internal storage of iPhone; however, we couldn’t find music sync option which iTunes offer.


