Booting is a process of starting the computer. When it’s about Ubuntu and your system fails to start then you must perform a boot repair. For example, if you turn on your system, it goes directly to a black screen mode or it gets stuck after Grub, then these are the symptoms we are looking forward to. Sometimes there might be other issues too, like display not rendering properly or showing dots-noise. You can solve all these issues by simply repairing Ubuntu’s boot.
Resolve Ubuntu Startup Issues Automatically with Troubleshooting Facility:
Luckily, Ubuntu has developed an excellent utility to help you resolve startup issues. For example:
- Ubuntu not booting after Windows installation.
- Grub not showing after software update.
- Windows not booting after Ubuntu’s installation.
- Blank or black screen after starting Ubuntu.
- Ubuntu not booting in safe-mode, recovery etc.
In order to resolve all of the above-listed issues, let’s learn how to repair Ubuntu boot, follow this procedure:
1. Download Boot Repair Kit and create a live USB disk for these boot tools.
2. Turn off your computer and boot it through USB disk. You might need to change boot-sequence in BIOS settings to enable boot by USB on priority.
3. The first screen will ask you to choose language. After choosing language, choose 64-bit. (Assuming your computer supports 64-bit, if it doesn’t you’ll need to download 32-bit version of the Boot Repair Kit).

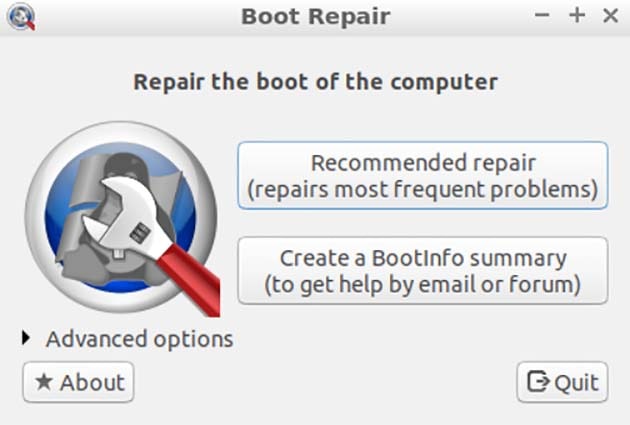
4. If you press Recommended repair then it’ll repair your most issues with Grub. You’ll have the option to view Grub details along with enabling ubuntu advanced startup.
5. After performing the recommended startup repair, this software will ask if you want to upload repair details to Pastebin or not. If you press yes, then it’ll generate a link of all your startup details so that you may share it with some developer, in case your issue isn’t solved.
Start your system normally and you’ll notice that all of the boot issues are gone. In case you still aren’t able to start Ubuntu then keep on reading.
Reinstall Kernel and Grub latest version:
In case Ubuntu fails to start after recommended repair, the next thing you should do is to reinstall kernel and grub. During this process you might need to run some local commands as shown by this repair wizard. Let’s follow the procedure:
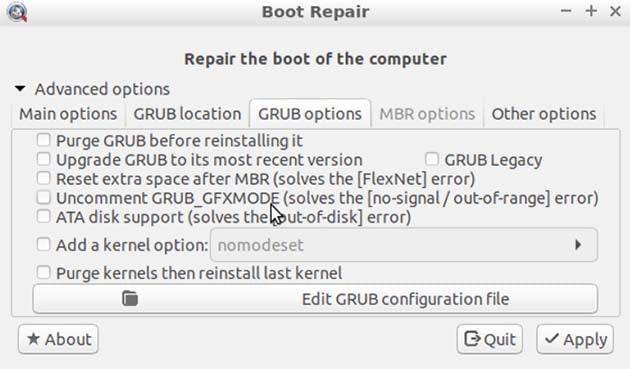
1. Click on Advanced Options and go to Grub options.
2. Tick Upgrade Grub to latest version and Purge kernel then reinstall last kernel.

3. Click Apply and after that the reinstallation and update procedure will start. During this procedure, this utility will ask you to run certain commands in the terminal. You should launch terminal from the start menu and paste those commands one by one.
After updating Grub to the latest version, the utility will ask you to restart. After a successful restart you’ll notice that all the issues are gone. Your Ubuntu will start without any boot errors.
Conclusion:
After the successful startup, you can start your system in safe mode and on TTY you can easily update your Ubuntu to the latest version. Ctrl+Alt+F1 is the shortcut command to help you enter TTY. You can start TTY anytime and through that, you can run the update command. For example, sudo apt-get upgrade.


